Instead of reaching for the touchscreen after a stereo swap, connect your factory steering wheel buttons through an interface matched to your vehicle and new head unit, then program and test each supported command. This 2026 guide covers compatibility, wiring, button assignment, and the faults to check before putting the dash back together.
- For steering wheel controls aftermarket stereo installations, match the vehicle interface to both the car and head unit.
- Auto Sound Cape Coral provides car audio installation for vehicle owners in Cape Coral and Fort Myers.
- Factory button signals need a compatible input; Bluetooth pairing does not replace the steering wheel control connection.
- Test volume, track, phone, and voice commands before reinstalling the dash trim.
Why this matters
A new stereo does not automatically understand the signals from your factory buttons. The connection needs to translate those signals into commands the head unit accepts. A radio that plays music normally can still have completely inactive steering wheel controls.
Auto Sound Cape Coral is a local car audio installation option for Cape Coral and Fort Myers vehicle owners. Professional installation puts the work in an installer's hands; you still need to specify which factory functions you want retained. Start with Auto Sound Cape Coral if you want help with the stereo installation rather than handling the wiring yourself.
For a 2026 upgrade, check the exact equipment combination before ordering. A connector that fits physically does not prove that the electronics or button commands are compatible.
Before you start
- Gather exact equipment details. Record the vehicle's model year, make, model, trim, factory audio package, and new stereo model. Get the vehicle-specific interface instructions, head unit manual, and correct harness diagram.
- Have the right materials and access. You need the specified interface and radio connection lead, suitable wiring tools, insulated connections, and access to the stereo harness. Follow the vehicle manufacturer's battery-disconnection procedure before electrical work. Leave steering wheel and airbag wiring alone.
- Check the hidden compatibility issue. Some vehicles carry button commands over a data network rather than a simple resistive circuit. Factory amplifiers, cameras, warning chimes, and vehicle settings can require additional retention hardware; a steering wheel adapter alone does not establish support for those features.
Do not buy an adapter solely because its listing says universal. Verify your exact vehicle and head unit against the interface manufacturer's current application information, including any firmware or separate cable requirements.
Vehicle and head unit compatibility
Choose the correct signal path
Your first job is identifying how the factory buttons communicate. The interface instructions—not wire color guesses—determine the connection method.
| Connection approach | Best for | Advantage | Limitation |
|---|---|---|---|
| Analog steering wheel interface | Supported vehicles with resistive button circuits | Translates factory button signals into compatible radio commands | Requires the correct signal wiring and radio output configuration |
| Vehicle data interface | Supported vehicles with network-based radio controls | Interprets vehicle data for supported retained functions | Vehicle coverage, firmware, and radio compatibility must match |
| Direct learning input | A documented match between a resistive vehicle circuit and a learning-capable stereo | Lets the radio learn supported button signals | Does not directly interpret vehicle network messages |
These are connection approaches, not interchangeable upgrades. Use the method documented for your exact combination. Direct learning is not a shortcut around a required data interface.
- Identify the factory audio package. Note any separate amplifier, premium sound system, or vehicle settings controlled through the original radio.
- Find the interface application entry for the vehicle. Confirm that it covers the factory system, not just the model name.
- Check the new stereo's steering wheel control input. Determine whether it takes a dedicated cable, a wired remote connection, or documented learning-input wires.
- Confirm the required radio connection lead and programming method. Check current firmware instructions for the equipment you are fitting in 2026.
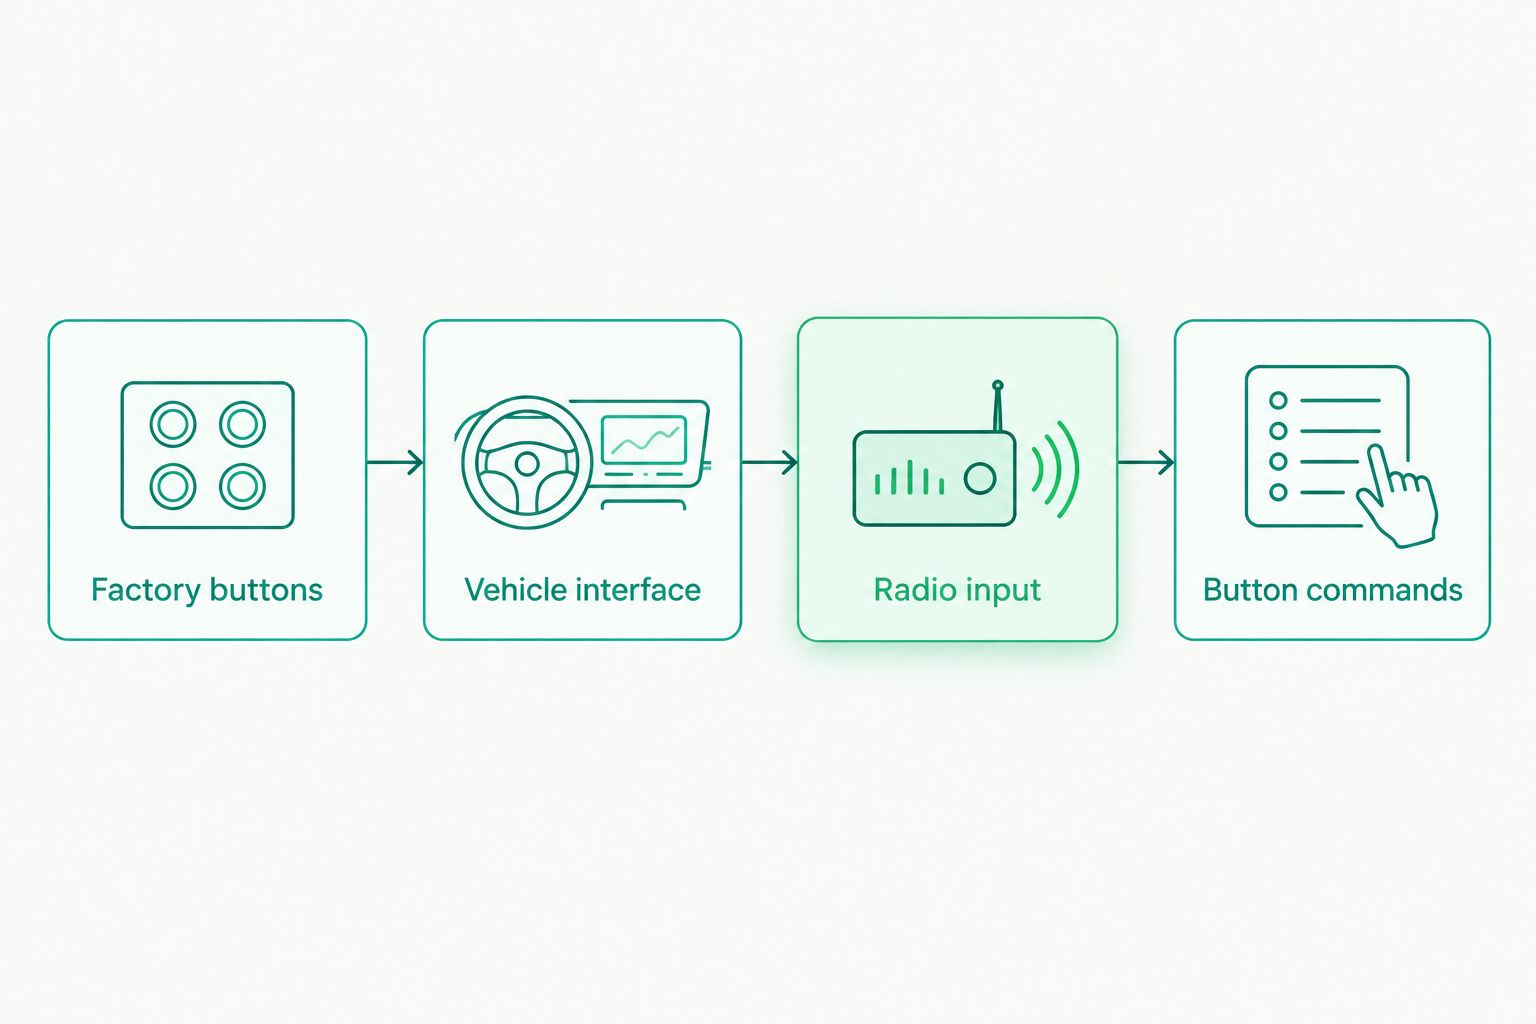
Expected result: You have a documented path from the factory harness, through any required interface, to the new stereo's control input. No connection depends on an assumed wire function.
The whole path matters. A correct vehicle interface paired with the wrong radio lead still leaves the steering wheel buttons disconnected from the head unit.
Harness and radio connections
Wire the interface before closing the dash
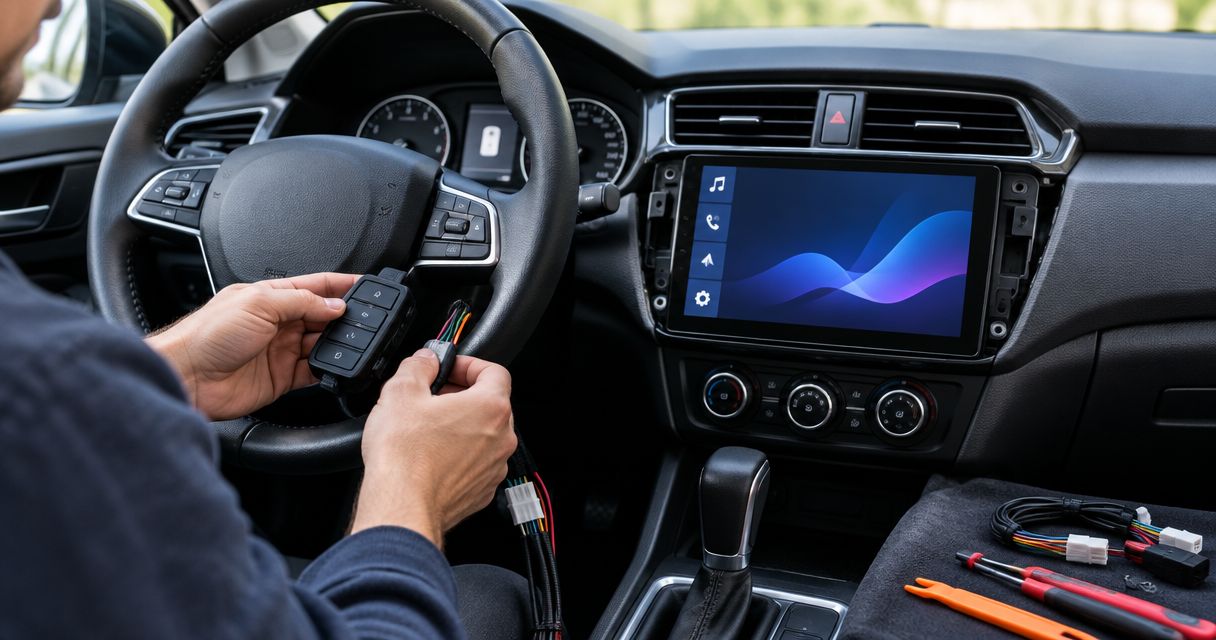
Work at the radio harness using the specified adapter connections. Do not remove the steering wheel to solve a stereo-side integration problem.
- Shut down the vehicle and follow its battery-disconnection instructions. Observe the manufacturer's specified waiting period and precautions before removing trim or unplugging equipment.
- Lay out the vehicle harness, interface harness, and radio harness. Match each connection by documented function and connector position, not color alone.
- Connect interface power and ground exactly as specified. Some interfaces use switched power, vehicle data, or a defined startup sequence; follow the supplied diagram.
- Connect the specified vehicle control wires or data connector to the interface. Insulate unused wires individually and secure completed connections.
- Connect the interface's radio output to the correct steering wheel control input. Where a 3.5 mm plug is specified, seat it fully in the designated socket—not an auxiliary audio input or microphone socket.
- Check cable routing before restoring power. Keep wiring clear of sharp brackets and trim clips, and leave enough access to inspect the interface during testing.
Expected result: The interface and head unit have their documented power, ground, vehicle-side, and radio-side connections. No loose conductors remain exposed.
Some learning-capable radios use terminals marked KEY1 and KEY2. Those markings identify control inputs on equipment that uses them; they do not establish compatibility with your vehicle. Follow that radio's manual for the signal reference and any unused input.
Never apply 12 V to a steering wheel control signal input. A power wire and a button-signal wire serve different jobs. Do not join learning inputs together or connect vehicle data wires to them unless the exact installation instructions specify that arrangement.
Interface programming and button mapping
Configure recognition before assigning commands
Programming differs by interface and head unit. Use the exact buttons, switch positions, software, and menu labels shown in the manuals for your equipment; there is no universal touchscreen sequence.
- Set the interface's radio type using its documented method. Complete any required firmware loading or vehicle selection before starting recognition.
- Restore power following the installation instructions. Keep the vehicle stationary and observe the interface's documented status indication.
- Complete automatic recognition or manual programming in the specified order. Do not press steering wheel buttons during startup unless instructed.
- If the stereo supports button learning for this installation, open its documented learning screen. Assign each supported command using the manufacturer's sequence, then use the specified save action.
- Check short-press and long-press assignments separately where supported. Avoid assigning the same command twice unless that is intentional.
Expected result: The interface reports the documented successful state, and each supported button performs its assigned action without also triggering another command.
Phone and voice buttons need extra attention. A factory voice button does not guarantee access to the new stereo's smartphone voice function. The interface, radio, and selected operating mode must all support that command.
For a 2026 CarPlay installation, include voice activation and call handling in the acceptance test. Getting volume control working does not prove that every smartphone-related button is retained.
Function testing and final assembly
Verify operation with the dash still open
Test while connectors and the interface remain accessible. Finding a fault after the trim is installed adds avoidable disassembly.
- Check basic audio. Confirm the stereo starts and produces sound before diagnosing button mapping. Separate an audio-system fault from a control-input fault.
- Test each button. Check volume up, volume down, track changes, source selection, mute, phone, and voice commands wherever those functions are supported.
- Check different sources. Test the commands in radio playback and your intended phone-audio mode. Track and voice behavior can differ by source.
- Check restart behavior. Complete 2 ignition cycles using the vehicle and interface instructions. Confirm that button assignments remain stored and controls return after startup.
- Check retained functions. Verify any factory amplifier, camera, chime, or vehicle-setting function included in the installation plan.
- Secure and reassemble. Fasten the interface and wiring, then reinstall trim without pinching the harness. Repeat the button check afterward.
Expected result: Supported controls work consistently before and after reassembly. You have also verified the factory features included in the job, rather than assuming that working buttons prove everything else works.
Keeping the interface when replacing the stereo again
An existing steering wheel interface is not automatically compatible with a replacement head unit. Reuse it only after confirming the new radio connection and programming requirements.
- Record the installed interface model and current wiring before unplugging the old stereo.
- Check support for the replacement head unit. Confirm whether a different radio lead, firmware version, or configuration is required.
- Follow the documented procedure for changing radio type or clearing previous assignments. Do not reset unrelated vehicle modules.
- Repeat recognition, button mapping, source testing, and restart testing before reassembly.
Expected result: The retained interface communicates with the replacement stereo using a supported configuration. Existing wiring saves work only when the compatibility check supports keeping it.
Save the interface details with your 2026 installation records. A future installer needs the hardware model and wiring information, not just the name of the stereo that was removed.
Troubleshooting steering wheel controls
None of the buttons work
Start with interface power, ground, and the documented status indication. Then inspect the radio control lead and its socket. A working touchscreen does not confirm that the separate steering wheel input is connected.
If the interface does not recognize the vehicle, recheck the application, factory audio package, and specified vehicle-side connections. Do not start swapping signal wires at random.
Buttons trigger the wrong functions
Check the selected radio type before relearning buttons. An incorrect radio configuration can produce commands that the head unit interprets incorrectly.
For a learning-input installation, clear and repeat assignments only as the radio manual directs. Test each newly assigned button before continuing.
Volume works, but phone or voice does not
Check whether the exact interface and radio combination supports those commands. Then verify any separate short-press, long-press, or source-specific assignment.
An unsupported command is not fixed by repeatedly resetting the adapter. Keep the supported buttons working and use the head unit's available controls for the remaining function.
Controls fail after the vehicle restarts
Check the documented power connections and confirm that programming was saved. Review the startup sequence and interface firmware instructions.
Do not move the interface to a different power source simply to keep it awake. Correct the installation according to its wiring diagram.
Controls fail after trim goes back on
Inspect for a partly withdrawn plug, strained cable, or pinched harness. Restore secure routing and retest before replacing trim again.
This is why the final test happens twice: once with access to the wiring, and once with the dash assembled.
Customize your workflow
Write down the functions you actually use before assigning buttons. Prioritize volume, track changes, and the supported phone or voice command over rarely used shortcuts. Check that longer presses do not interfere with your normal short-press actions.
Ask Auto Sound Cape Coral about your complete car audio installation, including the factory features you want to keep. The shop provides car audio and CarPlay installation; discuss the exact vehicle and equipment before treating any retained function as part of the plan.
Keep a simple installation record: interface model, firmware information, harness details, and final button assignments. That record makes later troubleshooting more direct without requiring anyone to reverse-engineer the dash wiring.
FAQ
Can I keep steering wheel controls with an aftermarket stereo?
Yes, when the vehicle controls and aftermarket stereo are connected through a supported interface or a documented direct-learning arrangement. Confirm the exact vehicle, factory audio package, and head unit before choosing hardware.
Do I need a steering wheel control adapter?
You need an adapter when the factory button signals are not directly compatible with the new stereo. Network-based vehicle controls require a supported interface rather than a direct connection to analog learning inputs.
Can I connect KEY1 and KEY2 directly to the car?
Only connect KEY1 and KEY2 as specified by the exact radio and vehicle installation instructions. Those labels do not prove that the inputs accept your vehicle's factory signals, and they are not power connections.
Why does my stereo work but the steering wheel buttons do nothing?
The stereo's audio connections and steering wheel control connection are separate. Check interface power, vehicle recognition, radio configuration, and the dedicated control lead before changing button assignments.
Will my steering wheel voice button work with CarPlay?
The voice button works only when the interface, head unit, and configuration support that command. Test voice activation in the intended phone mode rather than assuming that working volume buttons confirm support.
Can I reuse my existing steering wheel control interface?
Reuse the interface only if its manufacturer supports the replacement stereo and vehicle combination. A different radio lead, firmware update, or programming procedure can be required.
Does Auto Sound Cape Coral install car stereos?
Auto Sound Cape Coral provides car audio and CarPlay installation for vehicle owners in Cape Coral, Fort Myers, and surrounding Southwest Florida communities. Discuss your exact vehicle, stereo, and desired factory-control retention before arranging the work.
One last thing
Take a photo of the interface label before closing the dash. A working installation can outlast your memory of which adapter is hidden behind the stereo. Keep that photo with the wiring instructions and your 2026 button map.