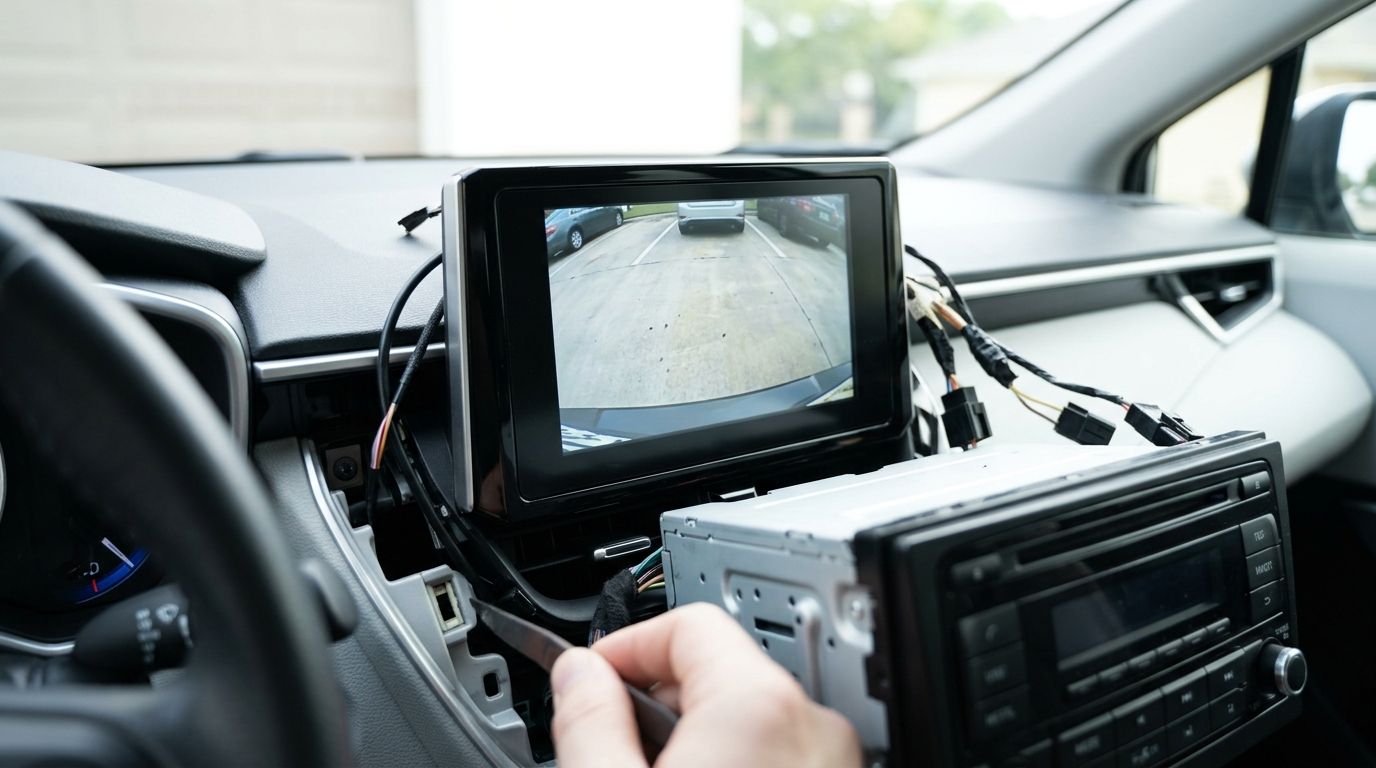
Instead of guessing which wire will put a backup-camera image on your factory radio screen, confirm the screen accepts a camera feed, then match the camera, interface and reverse signal to your vehicle. To connect a backup camera to a factory radio screen, you need a compatible video input or vehicle-specific interface; a video cable alone cannot add an input the radio does not have.
- To connect a backup camera to a factory radio screen, confirm camera-input support before buying parts.
- A vehicle-specific interface is the route when the factory radio has no usable camera input.
- Check camera voltage, video format and reverse-trigger behavior against the exact vehicle and radio.
- Auto Sound Cape Coral is best for local vehicle owners who want an electronics shop to assess factory-screen compatibility.
Why this matters
A factory screen can look camera-ready without having an accessible aftermarket camera input. Some vehicles require an interface to introduce video to the radio; others already have a camera connection but need the correct harness, signal or configuration. The answer depends on the vehicle and the radio installed in it, not just the size of the display.
A bad connection can produce a black screen, a rolling image, a camera that stays on after you leave reverse, or a camera that receives the wrong voltage. In 2026, identify the radio and its input before buying a camera. If you are comparing camera setups for a tow vehicle, the backup cameras for boat trailers and tow vehicles guide covers the separate question of what you need to see behind the vehicle.
Auto Sound Cape Coral is an automotive electronics shop serving Cape Coral, Fort Myers and nearby Southwest Florida communities. It is a practical contact when you want a local shop to assess whether your factory screen can take a camera feed. The limitation is straightforward: the shop still needs your vehicle and radio details before anyone can name the correct interface or confirm a wiring path.
Before you start
- Identify the vehicle and radio. Record the vehicle's year, make, model and trim, plus the radio's part number or equipment details if available. A radio swapped from another trim can change the answer.
- Get the right documentation and tools. You need the vehicle wiring diagram, the camera and interface instructions, a multimeter, suitable trim tools and a way to make protected, secure connections. Disconnect the battery before removing trim or making connections, following the vehicle service procedure.
- Check the voltage before connecting power. A vehicle described as a 12 V system does not make every camera connection a 12 V output. Some original-equipment cameras use a 6 V supply. Applying 12 V to a camera marked 6 V risks damage. Verify the camera's stated input and measure the proposed supply point first.
The mid-install gotcha: a screen's existing camera image does not prove that its factory camera connector accepts a replacement camera's signal directly. The original camera and radio can use a different video format, connector or power arrangement. If the interface instructions do not identify your exact radio and input path, stop before cutting the harness.
Check the factory-screen input
Start with the screen, not the camera. You need to establish whether the radio accepts an external rear-camera signal and, if it does, where that signal enters. An unused-looking connector is not proof of a camera input.
- Match the radio to the vehicle documentation. Use the radio identification and a vehicle-specific wiring diagram or interface compatibility list. Check whether the listed camera input applies to your exact radio variant, not just the vehicle model.
- Identify the input method. The documented path will be a factory camera connection, an input provided by a compatible interface, or no supported path to that screen. Note whether a harness supplies the connection without cutting original wiring.
- Check how the screen changes to reverse view. The radio might respond to a vehicle-network message, a dedicated reverse input or an interface that handles the switch. Follow the documented method rather than assuming a reverse-light wire belongs at the radio.
- Record what is already working. If the vehicle has a factory camera, test it before changing anything. Note whether the picture appears only in reverse and whether the screen returns to its previous view afterward.
Expected result: you can point to a documented video-input path and a documented reverse-switching method. If either is missing, do not treat the camera as a plug-in job.
Match the camera and interface
A camera must send a signal the screen or interface understands. Connector shape alone does not establish compatibility. Likewise, an adapter that physically fits the harness can still serve a different radio variant.
- Check the interface compatibility list. Match the vehicle, radio and existing camera configuration to the interface instructions. If the radio has a documented direct camera input, confirm the required connector and wiring instead of adding an unnecessary module.
- Check the video format. Compare the camera output with the format accepted by the radio or interface. Do not assume a camera sold for an aftermarket head unit works with an original-equipment screen.
- Check the camera supply. Read the camera's voltage requirement and the interface's camera-power output specification. A camera marked 6 V needs a compatible supply; a nominal 12 V vehicle circuit is not a substitute.
- Plan the physical route. Identify the mounting position, the route from the rear of the vehicle to the radio or interface, and the location of any connection exposed to water or moving panels. Keep the cable clear of hinges, sharp edges and airbag deployment areas.
Expected result: your parts list names a compatible camera, a supported screen connection and a defined power source. If the instructions leave any of those blank, get a vehicle-specific answer before installation.
Connect power, video and reverse switching
Make connections from the matched wiring diagrams, not from wire color alone. Colors can change across trims, harnesses and previous repairs. If the vehicle has been modified, confirm each circuit at the connector before you attach the camera.
- Disconnect power before making connections. Follow the vehicle service procedure, especially where trim removal brings you near airbags or electrical modules. Do not probe an airbag circuit to find a convenient ground or trigger.
- Mount the camera and route its cable. Use the mounting instructions for the chosen camera. Protect the cable where it passes through metal or a moving hatch, and keep weather-exposed connections protected.
- Connect the video signal. Attach the camera output to the documented camera input or interface input. If the instructions call for an adapter harness, use its identified camera connection rather than guessing at radio pins.
- Connect the specified camera power and ground. Confirm the camera's rated voltage against the measured or specified output. If the documentation calls for a regulated camera supply, do not replace it with a reverse-light connection.
- Connect reverse switching only as documented. A dedicated reverse-trigger input requires the specified signal. A vehicle-network interface can handle switching differently; feeding voltage into the wrong wire can damage a module.
- Restore power and test in a safe location. Secure the vehicle, keep people clear of its path, select reverse and check the image. Leave reverse and confirm that the radio returns to its normal display.
Expected result: the screen shows the rear view when the supported system calls for it, then exits that view correctly. Test with the vehicle stationary before relying on the image while maneuvering. Keep using mirrors and direct observation; a camera does not show every hazard.
Confirm the image is useful
An image on the screen proves that video is reaching it. It does not prove that the camera is mounted well, that the picture is oriented correctly or that any parking guidelines represent your vehicle's path.
- Check orientation. Objects behind the vehicle must appear on the expected side of the picture. Follow the camera or interface instructions if the image needs a mirror setting.
- Check coverage. Stand in a safe position and verify that the image shows the area the camera was installed to cover. If the view is aimed too high or blocked by vehicle hardware, adjust the mount.
- Treat guidelines separately from video. Guidelines can come from the camera, radio or interface. Confirm which device generates them before changing a setting, and do not assume drawn lines are calibrated to your vehicle.
- Retest after reassembly. Move any hatch or trunk lid through its normal travel and check that the picture does not cut out. A cable pinched during trim reinstallation can pass an initial stationary test.
For a 2026 installation, test the complete sequence before putting every panel back. It is easier to correct a loose connector while the connection is accessible than after the interior has been reassembled.
If the vehicle already has a factory camera
Keeping or replacing an existing factory camera is a different job from adding a camera to a vehicle without one. First determine whether the fault is in the camera, its power, its wiring, the radio or a related module. Do not replace a camera solely because the screen is black.
- Confirm the screen still switches to camera view. If it switches but shows no usable picture, focus the diagnosis on the video path and camera supply. If it never switches, check the documented reverse-switching path as well.
- Identify the original camera connection. Match the connector, power requirement and video signal to the vehicle documentation. A replacement camera needs more than a plug that looks similar.
- Choose a documented replacement path. Use a compatible replacement or a specified interface that converts the new camera signal for the existing screen. Test it before securing the rear trim.
Expected result: the replacement image appears under the same reverse-view conditions as the working original system. If the interface cannot support the original radio's camera input, replacing the camera alone will not fix the mismatch.
Troubleshooting a factory screen that will not show the camera
The screen never changes when you select reverse. Check whether the radio or interface receives the documented reverse signal. Do not move the camera's video wire to a power terminal; switching and video are separate jobs.
The screen changes, but the picture is black. Check camera power at the specified connection, ground continuity where the instructions permit testing, and the video connectors. Confirm that the camera and input use a compatible signal format before replacing parts.
The picture rolls, flickers or drops out. Recheck video-format compatibility and inspect the video cable and connections, especially where the cable passes through a moving panel. If the fault appears only when the hatch moves, inspect that cable route first.
The camera works, but stays on after you leave reverse. Check the documented trigger connection or interface configuration. A trigger tied to a constant-power circuit will not behave like a reverse-only signal.
The picture appears, but left and right look wrong. Check the camera's mirror setting or the relevant interface setting using its own instructions. Do not swap video and power wires to correct orientation.
Customize your workflow
Once the basic rear view works, decide whether the screen needs to support another camera view or whether the vehicle needs a different display solution. Do not buy a second camera until the interface documentation confirms how additional views are selected. Extra video inputs and on-screen switching are features of particular hardware, not a safe assumption about every factory radio.
For a truck, the camera position and the view needed when towing can change the hardware choice. Use the backup camera systems for trucks guide to compare that decision separately from the factory-screen connection. If keeping the original radio is not workable, the car stereo head units for older vehicles guide covers the alternative of changing the display hardware.
Auto Sound Cape Coral serves local vehicle owners with automotive electronics installation. If you want the shop to assess your screen, bring the vehicle details and explain whether a camera is already installed. Auto Sound Cape Coral is best for Cape Coral-area drivers who want an in-person compatibility assessment; it cannot identify the right camera interface from screen size alone.
Check your factory-screen setup
Bring your vehicle and radio details for a compatibility assessment.
FAQ
Can I connect any backup camera to a factory radio screen?
No. The factory radio needs a supported camera input or a compatible interface, and the camera's video format and power requirement must match that setup.
Does a factory screen automatically have a backup-camera input?
No. A display does not prove the radio has an accessible camera input. Check the exact radio and vehicle documentation before buying parts.
Do I need an interface to add a backup camera?
You need an interface when the supported installation path requires one. Some factory radios have a documented direct camera input; others need a vehicle-specific module.
Can I power the camera from a reverse light?
Only if the camera and installation instructions specify a compatible supply from that circuit. Verify voltage first; a camera marked 6 V must not be connected directly to a 12 V supply.
Why does my radio switch to a black screen in reverse?
The radio is switching views without receiving a usable image. Check the documented camera power, ground, video connection and signal compatibility.
Can I replace a factory camera without replacing the radio?
Yes, if a replacement camera or interface is documented as compatible with the existing system. Match its power and video requirements before making the connection.
Will parking guidelines work with an added camera?
They work only when the camera, radio or interface provides them in the chosen setup. Confirm which device draws the lines and whether its instructions require configuration.
One last thing
The reverse signal and the video signal do different jobs. A radio can switch to camera view perfectly and still show black because the camera feed is missing or incompatible. When diagnosing a 2026 install, check those paths separately before replacing the radio.