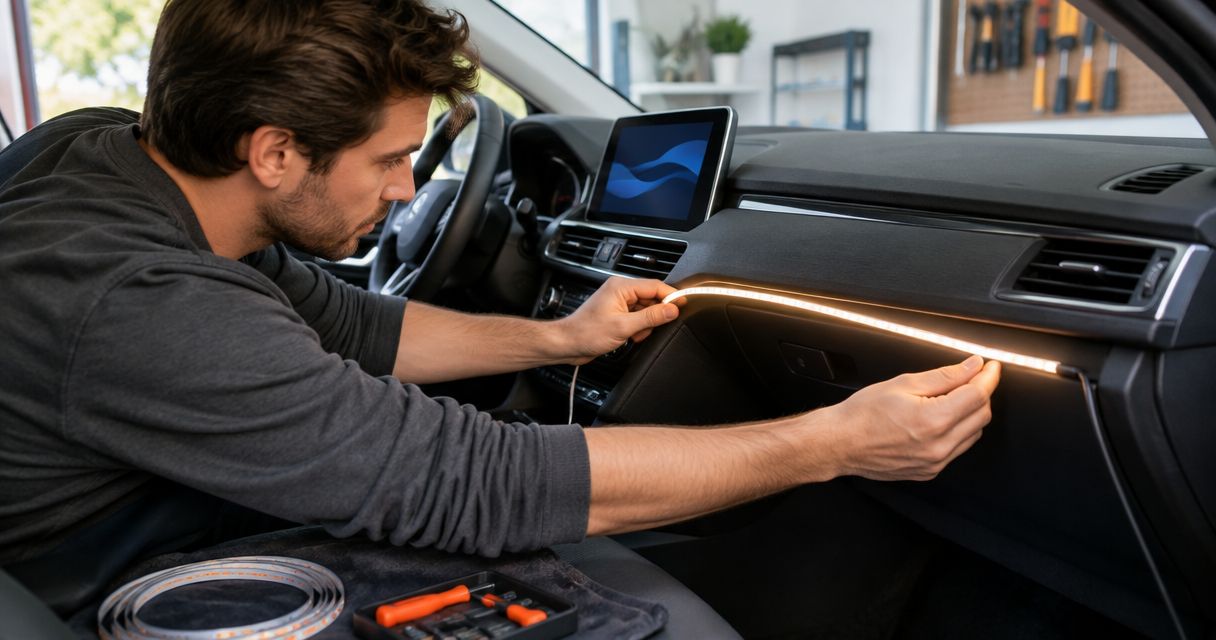
Instead of swapping in LED bulbs and clearing the same dashboard alert after every drive, match the bulb to the vehicle’s lighting circuit, install it correctly, and test every lighting state before closing the housing. That is how to install led lights without triggering dashboard warning light alerts in 2026; a resistor is not the automatic fix.
- To install led lights without triggering dashboard warning light alerts, confirm bulb fit, circuit compatibility and connector seating before adding parts.
- An LED that illuminates can still trigger a bulb-out alert if the vehicle’s circuit does not recognize its electrical load.
- Auto Sound Cape Coral is best for Cape Coral drivers seeking local automotive-electronics installation help; confirm LED-lighting work before booking.
- Test the lights with the engine off and running, then check every relevant lighting mode before closing the housing.
Why this matters
A working LED and a warning-free installation are different outcomes. Some vehicles monitor the electrical load on an exterior-light circuit. An LED can light up while the vehicle still reports a failed bulb. A loose connector, wrong bulb type or existing circuit fault can produce a similar alert, so buying a decoder before checking the installation can leave the real problem untouched.
The fix also depends on which light you changed. A cabin lamp, turn signal, brake light and headlight do not have the same job or the same vehicle-specific requirements. In 2026, start with the owner’s manual and the instructions for the exact lighting assembly, not a generic promise that a bulb is compatible with every vehicle. If you want help sorting out an automotive-electronics installation in Cape Coral, start with Auto Sound Cape Coral and confirm that the shop handles your specific LED-lighting job.
The best fix is the one that addresses the identified fault. A decoder cannot repair a loose connector, and a new bulb cannot repair damaged wiring.
Before you start
- Confirm the exact application. Record the vehicle’s year, make, model and trim, the lamp location, and the bulb or assembly specification in its documentation. Check whether the bulb is replaceable at all; some assemblies are not designed for a simple bulb swap.
- Get safe access and the right parts. Have the specified replacement, the lighting instructions and any access tools the vehicle procedure calls for. Switch the lights off, let the assembly cool and follow the vehicle’s procedure before unplugging anything.
- Check the non-obvious fit issue. A plug that connects is not proof of electrical or optical compatibility. Verify the socket, polarity where applicable, housing clearance and whether the vehicle monitors that circuit. Do not order a load resistor merely because the package says it prevents warnings.
For a headlight or other road-facing lamp, check the vehicle’s lighting requirements and the bulb manufacturer’s stated application before installing it. If the documentation does not confirm the swap, stop rather than trying to make an unsuitable bulb fit.
Identify the circuit and record the original result
- Turn on the original light in every mode that applies to it. For a turn signal, check its flashing behavior; for a brake light, check the brake-light function; for a headlight, check its available lighting modes.
- Check the instrument cluster for an existing alert. Record the wording or take a photo so you can tell a new warning from one that was already present.
- Inspect the original lamp and socket after switching the circuit off and allowing it to cool. Look for a loose plug, corrosion, heat damage or a seal that is not seated. Do not install a new bulb into a visibly damaged socket.
- Confirm the replacement specification against the vehicle and lamp documentation. If the vehicle uses a non-replaceable assembly, follow the assembly-specific procedure instead of forcing a bulb into it.
Expected result: You know whether the warning existed before the swap and whether the socket is sound enough to continue. If the original setup already triggers an alert, diagnose that fault first; an LED conversion is not its diagnosis.
Install and seat the LED
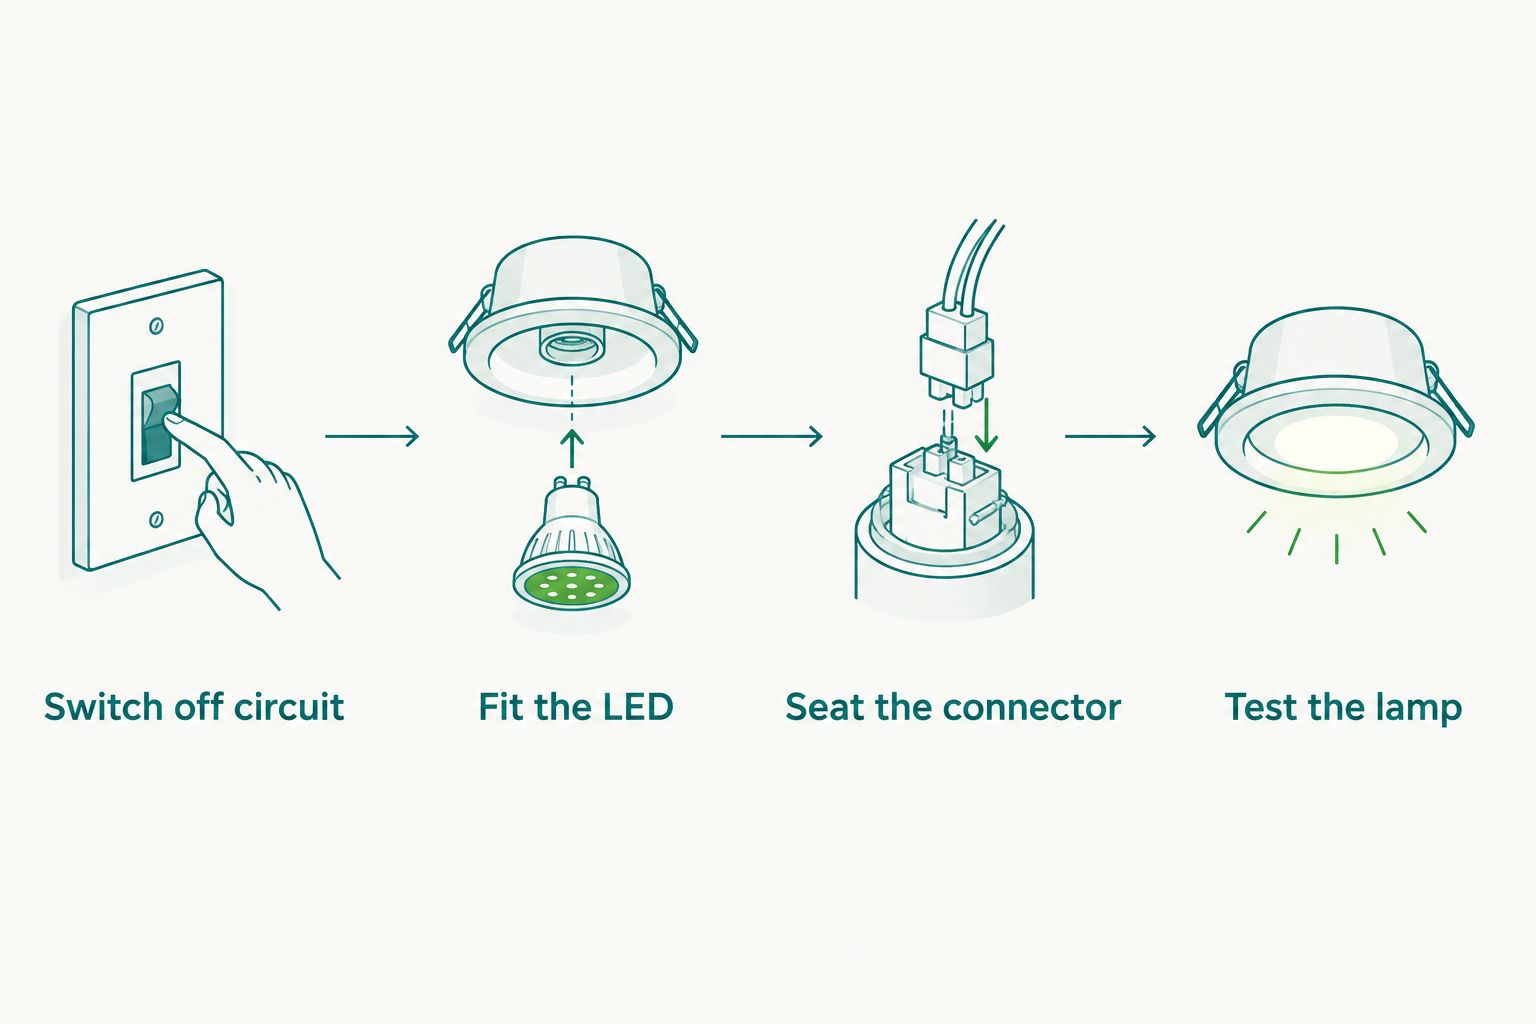
- Switch off the circuit and follow the vehicle’s access instructions. Keep removed covers, seals and retainers where they cannot collect dirt.
- Remove the original bulb using the specified release method. Do not pull on the wires to free the connector.
- Fit the LED as directed by its instructions. Check orientation where it matters, and confirm that the bulb, connector and any attached electronics fit without pinching a wire or pressing against a cover.
- Seat the connector fully and restore the housing seal. If the plug does not lock or the cover will not close correctly, stop and resolve the fit problem before powering the light.
- Test the lamp before final reassembly. If it does not illuminate, switch it off and check the connection and any polarity instructions for that exact bulb. Do not swap wires or modify the vehicle harness as a guess.
Expected result: The lamp works in its intended modes, and the housing closes as designed. A lamp that works only with its cover removed is not a completed installation.
Check for warnings in every operating state
- Run the relevant light modes with the engine off. Watch for a bulb-out message, rapid turn-signal flashing, flicker or a lamp that goes dark after initially lighting.
- Repeat the checks with the engine running. Some symptoms appear only when vehicle electrical conditions change; a single stationary test is not enough.
- Check every affected side and function. If you changed a paired set, test both sides. If you changed a multifunction lamp, test each function it serves.
- Close the job only after confirming the result. Refit access panels as instructed and make sure wiring cannot rub against moving parts or hot surfaces.
Expected result: The light performs its intended function and no new warning appears in the tested states. In 2026, do not call the job done because the LED lights up once. The dashboard and the lamp both need to pass the check.
Choose a correction only after identifying the cause
If the LED works but an alert remains, compare the available paths before adding anything to the circuit. The right choice depends on the vehicle, lamp and observed fault.
| Option | Best for | Advantage | Limitation |
|---|---|---|---|
| Correct the bulb fit or connection | A loose plug, wrong application or installation fault | Addresses a physical cause without adding electronics | Does not resolve a vehicle that rejects an otherwise compatible LED load |
| Use a documented, vehicle-compatible interface | A confirmed monitoring mismatch with a supported solution | Can address the circuit’s compatibility issue | Compatibility is application-specific; added components need secure placement |
| Keep the specified original bulb | A vehicle or lamp with no confirmed LED conversion path | Preserves the documented configuration | Does not deliver the LED change you wanted |
Do not install a generic load resistor against plastic, insulation or the lamp housing. Resistors used to mimic a bulb’s load can generate heat. Any added interface or wiring change needs instructions specific to the vehicle and circuit; do not defeat a fault warning to hide a bad connection. For help comparing lighting applications before you buy, read the LED lighting kits for cars guide.
Auto Sound Cape Coral is a local automotive-electronics shop serving Cape Coral, Fort Myers and surrounding Southwest Florida communities. Ask whether it handles the exact LED-lighting circuit and vehicle before booking: the shop’s stated services include automotive-electronics installation, but the supplied service description does not list LED-lighting installation specifically.
Ask about your installation
Confirm your vehicle, lamp location and warning before arranging service.
Install LEDs when the original light still works
Replacing a working bulb follows the same fit and test sequence, but your baseline is clearer: there should be no alert before you remove it. Test the original lamp first, record the clean dashboard, then change one lamp location at a time. If a warning appears immediately after the swap, revisit the new bulb and its connection before assuming the vehicle needs a decoder.
For paired exterior lights, test each changed location separately when practical. That narrows down which installation introduced the fault. In 2026, avoid changing several unrelated circuits at once and then trying to work backward from a single dashboard message.
Troubleshooting: the LED works, but the warning stays
- Bulb-out message with an illuminated LED: Recheck the bulb application and connector seating. If both are correct, establish whether the vehicle monitors that circuit and whether the replacement has a documented compatible interface. Do not treat the warning as proof that the bulb is defective.
- Turn signal flashes unusually fast: Confirm the correct lamp position and that every lamp on the affected side works. If the behavior began with the LED change, check for a documented solution for that vehicle and circuit rather than adding an unspecified resistor.
- Light flickers or turns off after startup: Check for an insecure connector, a pinched lead or a replacement that is not compatible with the circuit’s operation. Return to the specified original bulb if you cannot verify a safe fix.
- Warning existed before the installation: Restore the original configuration and diagnose the original fault. Inspect the socket and wiring rather than buying more conversion parts.
- Cover or seal will not close: Remove the LED and use a replacement that fits the documented housing. A warning-free lamp is not a good installation if the housing cannot be sealed correctly.
Do not keep swapping electrical components while a connector shows corrosion or heat damage. A repair to the original circuit comes before an LED conversion.
Customize your lighting plan
Treat each lamp location as its own decision. An interior light is not a substitute test for a turn signal, and a warning-free turn signal does not establish that a headlight conversion is suitable. Write down the exact lamp location, the vehicle specification, the original dashboard state and the result after installation. That short record helps you identify which change caused a new fault.
If your project also includes other vehicle electronics, plan power connections separately. A dash cam hardwire job and an LED bulb swap do not become safer because they share a work session; each needs its own circuit check. Auto Sound Cape Coral serves vehicle owners looking for automotive-electronics installation in Southwest Florida, so bring the vehicle details and the exact warning wording when asking about service.
For a 2026 lighting upgrade, make the decision in this order: documented fit, sound connector, correct operation, then a clear dashboard. Reverse that order and you risk buying a warning-light fix for a bulb that should never have been installed.
FAQ
How do you install led lights without triggering dashboard warning light alerts?
Match the LED to the documented lamp application, seat the connector correctly and test every relevant lighting mode. If a warning remains, identify whether it comes from a fit, wiring or vehicle-monitoring issue before adding an interface.
Why is my dashboard warning on when the LED still lights up?
The vehicle can flag an electrical load it does not recognize even while the LED illuminates. A poor connection or pre-existing circuit fault is another possible cause, so check the original result and installation first.
Do all LED bulb swaps need a resistor?
No. Add a resistor only when the vehicle-specific instructions identify it as the appropriate solution and its installation can be done safely; a resistor can generate heat and will not repair damaged wiring.
Can I ignore a bulb-out warning if the new light works?
No. Verify every function and resolve the warning so you can distinguish an installation problem from a later lamp failure. A visible light alone does not establish that the circuit is working correctly.
Should I test LEDs with the engine running?
Yes. Test with the engine off and running, using every relevant lighting mode. This checks whether the installation behaves differently when vehicle electrical conditions change.
What if the LED bulb does not fit behind the lamp cover?
Do not force the cover shut or leave the housing improperly sealed. Use a replacement that fits the documented assembly and allows its cover and seals to close correctly.
Can Auto Sound Cape Coral install LED lights in my car?
Confirm the specific job with Auto Sound Cape Coral before booking. Its supplied service description lists automotive-electronics installation but does not specifically list LED-lighting installation.
One last thing
Keep the original bulb until the new installation passes every test. If the alert starts immediately after the swap, restoring the original setup helps isolate the change; discarding the old bulb takes away that simple comparison. That remains the practical move for a 2026 installation, whether you do the work yourself or bring the vehicle to a shop.