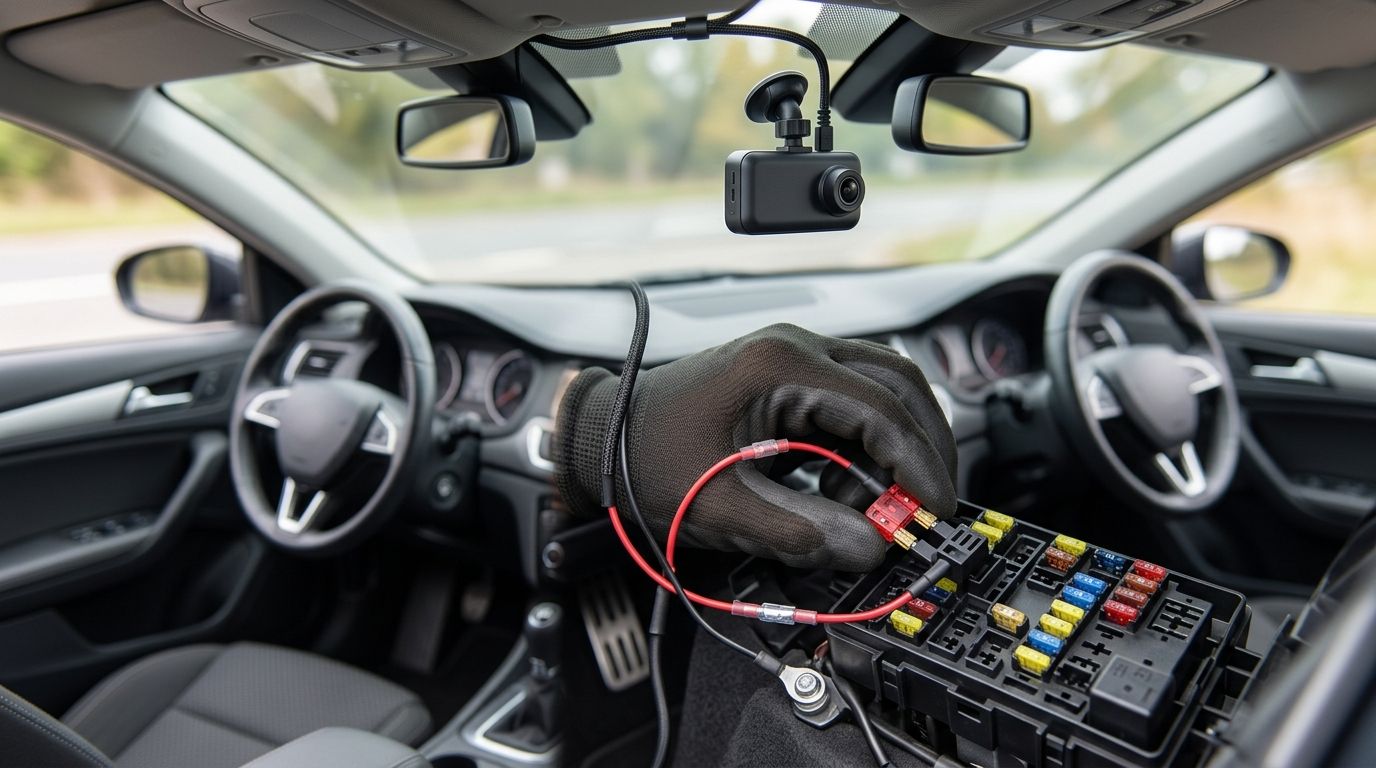
Instead of leaving your dash cam plugged into a socket that shuts off with the engine, connect a compatible parking-mode camera to constant power through a hardwire kit so it can monitor the vehicle while parked. A three-wire hardwire kit is the clearest setup for dash cam constant power parking mode: it separates always-on power from the ignition signal, but it still needs battery-voltage protection. For vehicle owners in Cape Coral and Fort Myers who want the wiring handled by a local automotive electronics shop, Auto Sound Cape Coral offers dash cam installation.
- For dash cam constant power parking mode, use a compatible three-wire hardwire kit with battery-voltage protection.
- Auto Sound Cape Coral is a local dash cam installation option for vehicle owners in Cape Coral and Fort Myers.
- Connect the constant-power lead to an appropriate always-on circuit and the ignition lead to a switched circuit.
- Parking mode needs camera support, a working power source and the right recording settings; constant power alone is not enough.
Why this matters
A dash cam that records while you drive does not automatically record after you park. Many vehicle accessory sockets lose power when the ignition turns off. Even when a socket stays live, leaving a camera in its normal driving mode is not the same as configuring its parking mode.
In 2026, the useful distinction is power plus behavior. The camera needs a source it can use while the engine is off, a way to recognize that the vehicle is parked, and settings that tell it what to record. The power connection also needs to stop drawing from the starter battery before that draw prevents the vehicle from starting.
Auto Sound Cape Coral is best for Cape Coral and Fort Myers drivers who want a local shop to install a dash cam rather than identify vehicle circuits themselves. A shop installation does not replace the need to choose a camera and power kit that support the parking behavior you want.
Before you start
- Check the camera and kit. Confirm that your dash cam supports parking mode and identify the power kit its manufacturer specifies. A camera that only accepts power through its supplied vehicle plug cannot be assumed to support a three-wire hardwire kit.
- Get the vehicle information and safe access. You need the vehicle-specific fuse layout, a way to verify circuits with a meter, the correct fuse-tap type if the kit uses taps, and a clean grounding point. Fuse locations and circuit behavior differ by vehicle.
- Check the gotcha before opening the fuse box. Some circuits that look constant or switched at first change state after the vehicle goes to sleep. Verify them again after shutdown, and do not use an airbag, braking or other safety-critical circuit as a convenient power source.
A nominal 12 V vehicle system does not mean every dash cam accepts direct vehicle power. Follow the camera and hardwire-kit instructions for power conversion and connections; never attach a camera’s USB input directly to a vehicle circuit.
Choose your parking-mode power path
There are two common ways to supply parking-mode power: a compatible three-wire hardwire kit and a compatible OBD-II parking-power adapter. Neither one makes an unsupported camera gain parking mode. Check the camera maker’s compatibility instructions before choosing either route.
| Power path | Best for | Advantage | Limitation |
|---|---|---|---|
| Three-wire hardwire kit | Drivers who want a tucked-away installation with a separate ignition signal | Separates constant power, switched power and ground | Requires circuit testing, proper fuse selection and careful wire routing |
| Compatible OBD-II parking-power adapter | Drivers whose camera and vehicle support that adapter | Avoids making connections at the fuse box | Port behavior and adapter features vary; it can occupy the diagnostic port |
For a factory-look installation, the three-wire route is the better fit when the camera supports it. An OBD-II adapter is a reasonable alternative only after you confirm that the adapter, camera and vehicle work together and that the adapter includes suitable battery protection. Do not treat the diagnostic port as a guaranteed always-on outlet.
Identify the camera’s power connections
A typical three-wire parking-mode kit has an always-on lead, a switched lead and a ground lead. Kits commonly mark them BAT, ACC and GND. Read the labels and wiring instructions on your actual kit; color alone is not a reliable guide.
- Find the kit’s BAT, ACC and GND markings. Match each wire to the function stated in the kit instructions before connecting anything.
- Locate candidate fuse-box circuits in the vehicle documentation. Rule out safety-critical circuits and any circuit the vehicle maker says must not be tapped.
- Test a candidate constant-power circuit with the vehicle off, then test it again after the vehicle has had time to shut down its accessories. Test a separate candidate switched circuit with ignition on and off.
Expected result: you have identified one verified always-on source, one verified switched source and a suitable ground point. If either circuit changes state unexpectedly, stop and choose a different permitted circuit.
The connection logic is simple; the vehicle-specific circuit choice is not. In 2026, use the fuse information for the exact vehicle rather than a fuse position shown in a generic installation video.
Connect and protect the hardwire kit
The fuse tap must fit the vehicle’s fuse type, preserve the original circuit’s protection and protect the new camera circuit. Tap orientation matters because the added circuit needs to pass through its own fuse. Follow the tap and kit instructions rather than copying a fuse position or fuse size from another vehicle.
- Switch the vehicle off and follow the vehicle and kit instructions for working at the fuse box. Connect BAT to the verified constant-power source using the approved connection method.
- Connect ACC to the verified switched source. If using fuse taps, confirm their orientation and fuse placement against the tap instructions before powering the camera.
- Connect GND to a suitable chassis ground as directed by the kit. A loose ground can make the camera restart or fail to turn on.
- Route the cable away from pedals, moving parts and airbag deployment areas. Secure loose cable, and keep it clear of trim clips when panels go back on.
Expected result: the camera receives power with the ignition on, and the hardwire kit still has access to its constant-power feed after the ignition is off. Do not close up the trim until you have tested both states.
Auto Sound Cape Coral provides dash cam installation for Southwest Florida vehicle owners. If you cannot verify the circuits, tap orientation or safe cable route, installation is the better choice than guessing at the fuse box.
Configure parking mode and verify the changeover
Constant power keeps a supported camera available; its recording menu determines what happens while parked. Menu wording differs by camera, so use the labels on your model rather than assuming every dash cam has the same controls.
- Open the camera’s Parking Mode setting, if that is the label your model uses, and enable the recording behavior you want. Check the camera instructions for any required hardwire-kit setting or firmware condition.
- Set the kit’s battery-voltage cutoff according to its instructions and your vehicle’s needs. Do not disable battery protection simply to keep the camera running longer.
- Start the vehicle and confirm normal driving recording. Turn it off, let the vehicle complete its shutdown, then check that the camera enters its parking state and saves a test clip when its stated trigger condition occurs.
Expected result: driving recording works with ignition on, and the camera enters its intended parking mode after shutdown without repeatedly rebooting. A successful test clip matters more than a lit power indicator: a powered camera that does not save parking footage has not passed the test.
Check the footage again after the vehicle has been parked for a normal stretch. A camera can pass an immediate ignition-off test and still shut down when the vehicle changes power states or the voltage cutoff activates. In 2026, test the complete parked-and-restarted cycle before relying on the setup.
Use event recording instead of continuous parking recording
If your camera supports both continuous parking recording and event-based parking recording, choose the mode that matches what you need to review. This is a settings variant of the same protected power setup, not a different wiring job. The names and available triggers depend on the camera.
- Select the camera’s event-based parking option if it offers one, then enable only the triggers the camera supports.
- Check whether impact events, motion events or both are available on your model. Motion detection generally needs a view of the area where movement occurs; an impact trigger responds to a different kind of event.
- Test the selected trigger safely while parked and confirm that the resulting clip appears in the camera’s recordings.
Expected result: the camera saves clips under the event conditions you selected instead of relying on a continuous parking file. The trade-off is that event recording only helps when its trigger detects the incident. Continuous recording provides a fuller timeline but keeps the camera active for longer, subject to the kit’s cutoff and the camera’s settings.
| Parking behavior | Best for | Advantage | Limitation |
|---|---|---|---|
| Event-based recording | Drivers who want clips tied to supported triggers | Narrows the footage to detected events | A missed trigger means no event clip |
| Continuous parking recording | Drivers who want an ongoing parked-vehicle timeline | Captures activity without waiting for an event trigger | Depends on sustained power and creates more footage to review |
Troubleshoot a parking-mode setup
The camera turns off with the ignition. Recheck the BAT lead at the hardwire kit, not just the fuse position on a diagram. Confirm the selected circuit remains powered after vehicle shutdown and that the kit’s cutoff has not stopped output.
The camera records normally but never changes to parking mode. Verify that the camera supports parking mode, that its setting is enabled and that ACC actually changes state with the ignition. A constant-power feed alone does not tell a three-wire camera when the drive has ended.
The camera restarts or drops recordings. Check the ground connection, fuse-tap fit, cable connections and the kit’s required power output. Confirm that the camera, cable and hardwire kit are compatible before changing vehicle circuits.
Parking mode works briefly, then stops. Check whether the battery-voltage cutoff activated. If it did, the protection is doing its job; do not bypass it. Review the camera’s recording settings and have the vehicle battery checked if starting or battery condition is already a concern.
The vehicle shows a warning or an original accessory stops working. Stop using the new connection and inspect the chosen circuit, tap orientation and fuse placement. Do not clear a warning and keep testing a connection that may affect a vehicle system.
Customize your workflow
Start with the footage you actually need. A driver leaving a car parked in a busy lot can prioritize a camera view and trigger that cover that location. Someone who wants a complete record while parked should confirm continuous parking recording is supported, then test how the battery cutoff behaves in their vehicle. Neither choice replaces checking saved clips.
Review three settings after installation: parking-mode behavior, battery protection and the camera’s recorded view. Also confirm that the camera keeps the correct date and time, since footage is harder to use when its timestamp is wrong. Recheck the setup after changing the camera, power kit or vehicle battery.
For Cape Coral and Fort Myers drivers, Auto Sound Cape Coral’s dash cam installation is the direct route when the obstacle is wiring rather than camera settings. Be clear about whether you want parked-event clips or continuous parked recording so the installation can be checked against that goal.
FAQ
How do I connect a dash cam to constant power for parking mode?
Use a compatible hardwire kit that connects to a verified always-on circuit, a switched ignition circuit and ground. Enable parking mode on the camera and test that it saves footage after the vehicle shuts down.
Will constant power alone turn on dash cam parking mode?
No. The camera must support parking mode and be configured to enter it; a three-wire setup also needs a working switched-power signal.
Can a parking-mode dash cam drain my car battery?
Yes, a dash cam draws power while the vehicle is off. Use a compatible power kit with battery-voltage protection and do not bypass its cutoff.
Is an OBD-II adapter better than hardwiring a dash cam?
A compatible OBD-II adapter avoids fuse-box connections, while a three-wire hardwire kit gives a separate ignition signal and tucked-away wiring. Check adapter, camera and vehicle compatibility before choosing the OBD-II route.
Why does my dash cam stop recording after I park?
The outlet or chosen circuit may shut off, or the power kit’s battery cutoff may have activated. Check the camera’s parking-mode settings and test power after the vehicle finishes shutting down.
Should I use event-based or continuous parking recording?
Use event-based recording when supported triggers cover the incidents you want to capture; choose continuous recording when you need an ongoing timeline. Both require a compatible camera, working parked-vehicle power and a successful footage test.
Can Auto Sound Cape Coral install a parking-mode dash cam?
Auto Sound Cape Coral provides dash cam installation for vehicle owners in Cape Coral, Fort Myers and nearby Southwest Florida communities. Confirm your camera and power kit support the parking behavior you want before installation.
One last thing
Do not call the job finished when the camera lights up with the engine off. In 2026, the pass-or-fail check is a saved parking clip followed by a normal vehicle restart. That single test catches the gap between constant power, working parking-mode settings and effective battery protection.