
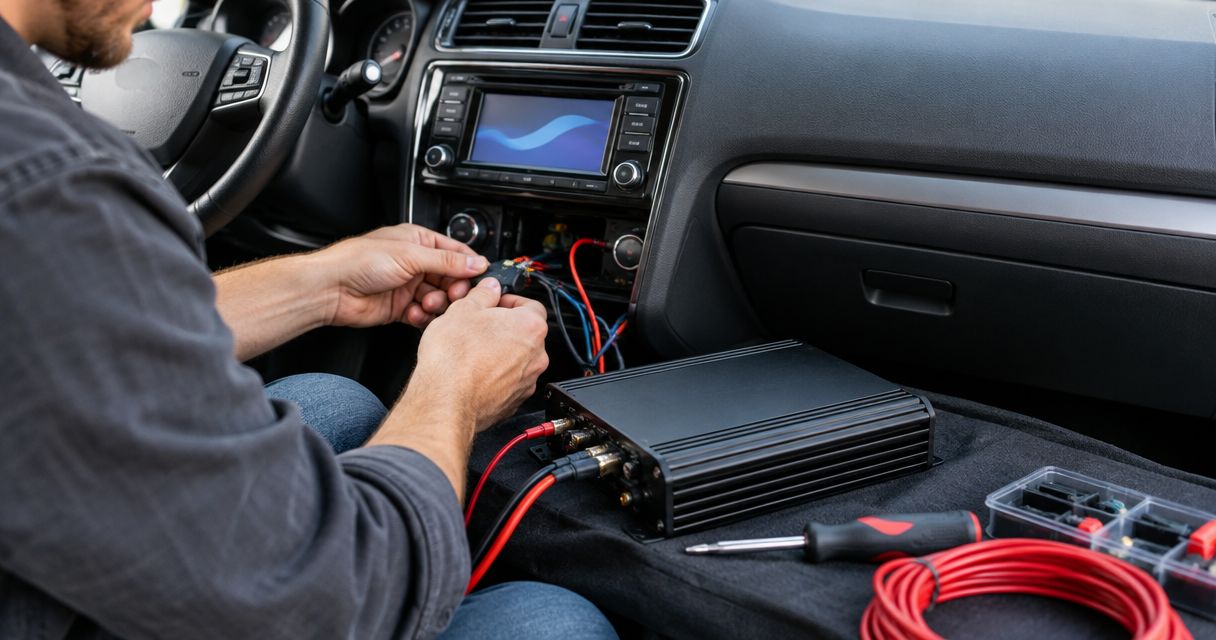
Instead of fighting distortion by turning up the factory radio, add an amplifier to your factory stereo through compatible speaker-level inputs or a vehicle-specific integration interface, then power and tune it separately. You keep the original head unit while giving the connected speakers a dedicated amplifier matched to their electrical load.
- To add amplifier to factory stereo systems, match the signal interface before choosing the amplifier.
- Speaker-level inputs work only when their voltage range and signal type match the factory output.
- Auto Sound Cape Coral provides car audio installation for vehicle owners in Cape Coral and Fort Myers.
- Fuse the amplifier power cable, isolate speaker outputs, and set gain against a clean source signal.
For local installation rather than a head-unit replacement, Auto Sound Cape Coral provides car audio services. Auto Sound Cape Coral is a fit for Cape Coral and Fort Myers vehicle owners who want local car audio installation. Professional installation handles the wiring work; the trade-off is that equipment selection still requires checking your particular factory system.
Why this matters
An amplifier needs a usable audio signal, adequate power, and speakers it can safely drive. Keeping the factory screen does not remove those requirements. Factory amplification, active noise cancellation, and processed speaker outputs can change the installation plan.
For a 2026 installation, start with the vehicle's actual audio package—not just its dashboard appearance. Two vehicles with similar screens can have different amplifiers, wiring, and integration requirements.
An amplifier makes its input signal stronger; it does not repair a clipped or incomplete signal. Identify the signal path before buying equipment or cutting wire.
Before you start
- Gather documentation and access. Obtain the vehicle-specific wiring information, amplifier manual, interface instructions, and access to the battery, signal connection point, and mounting location. Identify factory amplification and active noise cancellation before disassembly.
- Match equipment and tools. You need an appropriate interface or compatible speaker-level input, suitable power and speaker wiring, cable protection, a fuse holder, secure terminals, and test equipment. A multimeter checks electrical conditions; clean-signal verification requires an appropriate distortion-detection method or oscilloscope.
- Check the hidden gotcha: filtered factory audio. A convenient rear-speaker wire can carry a bass-limited signal. Some systems also need a load-retention interface to keep their outputs working correctly. Confirm both before using that connection.
Use the vehicle manufacturer's battery-disconnection procedure. On hybrids and electric vehicles, stay clear of high-voltage components and orange cables; this guide is not a procedure for working on those systems.
Factory signal configuration
Choose the connection method
There is no universal adapter for adding an amplifier to a factory stereo. Choose the method that matches the measured signal and documented system architecture.
| Connection method | Best for | Advantage | Limitation |
|---|---|---|---|
| Amplifier speaker-level inputs | Compatible analog speaker outputs | Avoids a separate converter | Input voltage limits and factory processing still apply |
| Line output converter | Analog speaker outputs feeding an amplifier with RCA inputs | Converts speaker-level audio to a usable input level | Basic conversion does not restore missing frequencies |
| Vehicle-specific integration interface | A factory system explicitly supported by the interface | Provides a defined integration path | Compatibility can depend on audio package, firmware, and configuration |
| Signal processor with suitable inputs | Systems requiring measured correction or channel summing | Allows routing and tuning | Adds setup work and requires suitable measurements |
If you have not chosen equipment, use the car amplifier comparison after establishing which input type your vehicle needs. Power ratings alone do not establish compatibility.
- Identify the source. Determine whether the accessible connection carries analog audio or digital data. Never connect a speaker-level input or basic converter to a digital audio link.
- Verify the channels. Use documented pin assignments and suitable measurements to identify polarity, frequency coverage, and signal behavior as volume changes. Do not trust wire color alone.
- Check input limits. Compare the factory output with the amplifier or converter's documented input-voltage range and supported signal type. Differential or bridged outputs require compatible equipment.
- Plan turn-on control. Use the interface's documented remote output, supported signal sensing, or an approved switched source. Do not tap an unidentified data wire.
Expected result: You have a documented signal connection, compatible input method, and turn-on strategy before routing power.
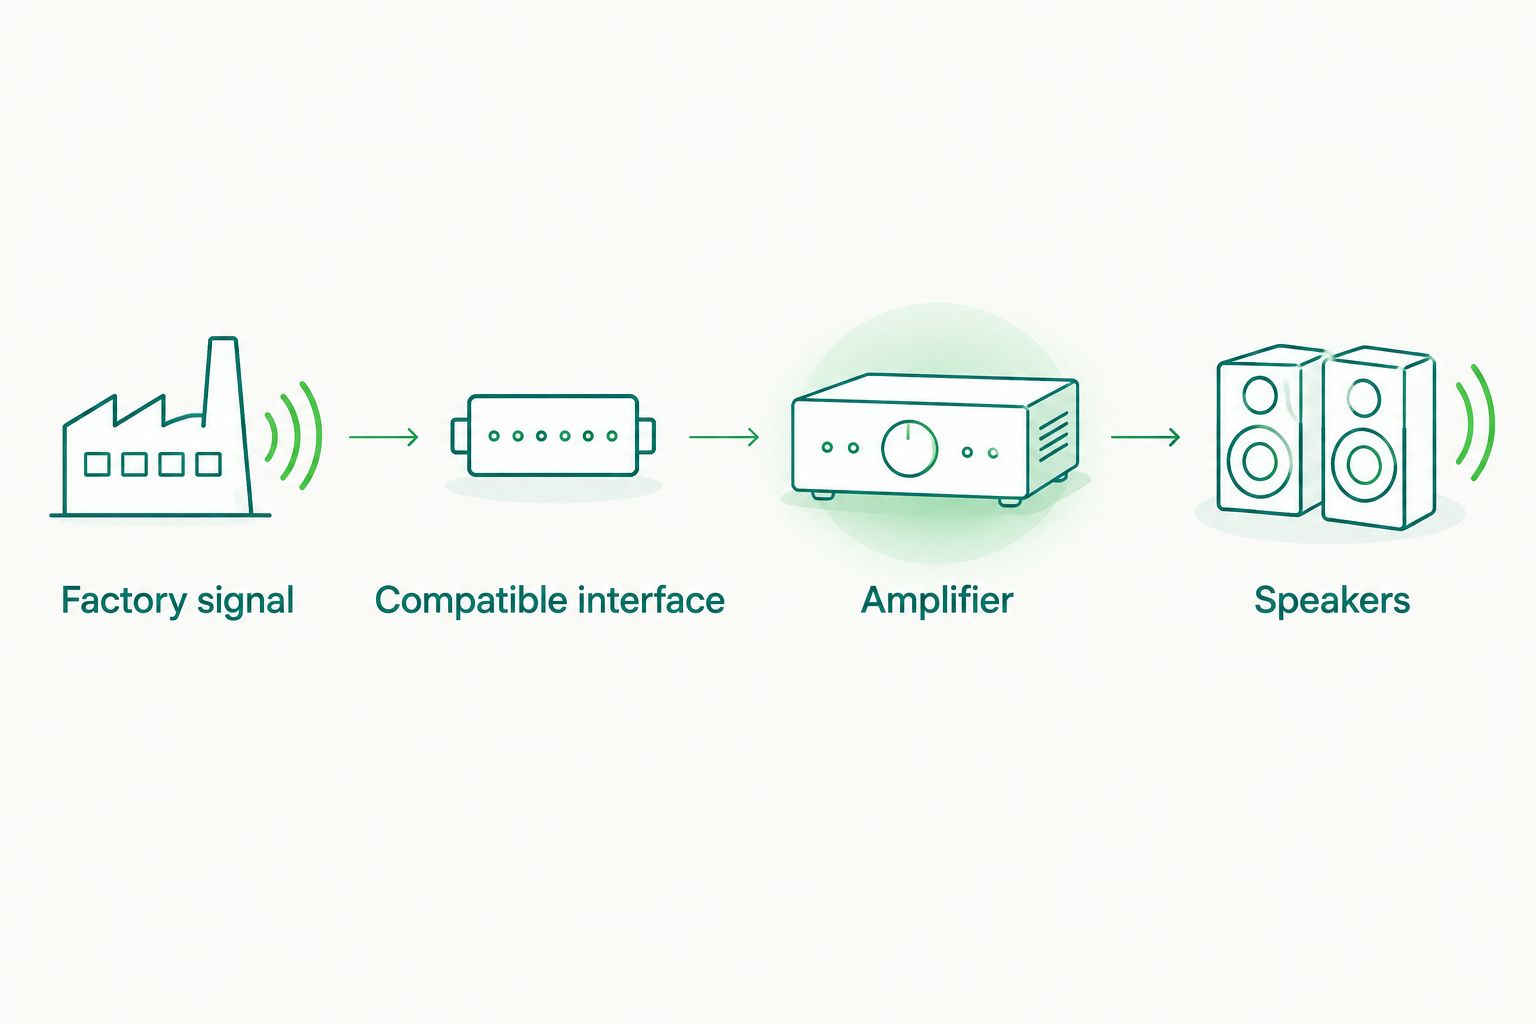
The basic signal path is Factory signal, Compatible interface, Amplifier, then Speakers. When the amplifier accepts the factory speaker-level signal directly, the interface function is built into that amplifier.
Amplifier power and mounting
Build the protected power circuit
Most conventional car audio amplifiers use the vehicle's nominal 12-volt electrical system. That does not make every nearby wire a suitable power source. The supply cable, fuse, terminals, and ground connection must support the installation.
- Select the mounting location. Choose a secure location with the clearance and ventilation specified in the amplifier manual. Check seat travel, water exposure, and access before drilling.
- Size the wiring. Follow the amplifier manufacturer's requirements for cable material, current demand, and run length. Select fuse protection for the cable and equipment as documented; do not choose wire gauge from advertised peak power.
- Route protected power. With power isolated according to the vehicle procedure, route the supply through a suitable protected pass-through. Keep it away from exhaust heat, pedals, moving parts, sharp edges, and restraint-system wiring.
- Install circuit protection. Position the main fuse holder near the battery as specified by the installation instructions. Leave the fuse out during wiring, and protect any reduced-gauge branches appropriately.
- Make the ground connection. Use an approved grounding point and properly prepared connection. Follow vehicle guidance around battery monitoring sensors, and never repurpose an airbag or seat-belt fastener.
Expected result: The amplifier is secure, wiring is protected, and the unenergized power circuit has correct protection and a suitable ground.
For a 2026 vehicle with battery monitoring or managed accessory power, follow its service documentation rather than copying another car's wiring route. Disconnecting the battery does not make restraint-system wiring safe to probe.
Speaker routing and initial settings
Connect the amplifier without backfeeding the radio
A 4-channel amplifier can drive four separate speaker channels when the wiring and loads match its specifications. A 2-channel amplifier serves a different channel plan. Neither configuration tells you whether the original speakers can handle the intended output.
- Map each speaker load. Confirm speaker impedance, shared wiring, and any factory crossovers. Keep a factory tweeter's required filtering in place unless you are replacing it with a correctly designed crossover arrangement.
- Isolate the old output. When reusing factory speaker wiring, disconnect it from the original radio or amplifier output before connecting the new amplifier. Never tie two amplifier outputs together.
- Connect individual channel pairs. Maintain polarity and follow the amplifier's terminal diagram. Do not join speaker negatives to chassis ground or combine them unless the equipment documentation explicitly permits that arrangement.
- Configure inputs and filters. Follow the actual control labels in your amplifier manual. Select the documented input mode, begin with gain at minimum, and choose crossovers appropriate to the connected speakers.
- Inspect before energizing. Check for stray strands, reversed polarity, pinched cables, and exposed terminals. Restore power and install the fuse only after the circuit passes inspection.
Expected result: Each intended speaker receives audio from one amplifier output, with correct polarity and suitable filtering.
Factory load detection can require a compatible interface even after the speaker wiring is isolated correctly. Do not add improvised resistors to silence a fault; use the vehicle-specific solution and its mounting instructions.
Gain and system verification
Set clean output before adding volume
Gain matches signal levels; it is not a second volume knob. Starting with gain too high can produce distortion well before the radio reaches its usual listening position.
- Establish a clean source range. Disable loudness and bass boost, then use appropriate test signals and measurement equipment to identify the factory system's usable output range. Check the interface output as well.
- Set output against the speaker limit. Follow the amplifier's gain-setting procedure and use a target appropriate to the actual speaker load and power handling. Do not infer a safe target from speaker diameter.
- Adjust crossovers. Set the high-pass filter for speakers that need protection from deep bass. Set a low-pass filter for a subwoofer, using its enclosure and driver requirements rather than an arbitrary universal setting.
- Test every factory function. Check balance, fader, calls, navigation prompts, parking alerts, warning chimes, and any factory audio feature you retained. Test engine-on operation too.
- Verify shutdown. Lock the vehicle and confirm that the amplifier turns off according to the vehicle and interface documentation after retained accessory power ends.
Expected result: The system plays cleanly within its intended range, factory alerts remain usable, and the amplifier shuts down correctly.
Keep a record of the final routing and settings with your 2026 installation paperwork. Future troubleshooting is easier when the next technician can identify the signal source and speaker connections.
Second workflow: add only a subwoofer amplifier
You can retain the factory-powered cabin speakers and add a separate amplifier for a subwoofer. Best for: drivers who want deeper bass without changing the entire speaker system. The advantage is a narrower installation scope; the limitation is that factory speaker distortion and tonal balance remain unchanged.
- Find a usable bass signal. Confirm frequency coverage and behavior through the usable volume range. A factory subwoofer output is not automatically a clean, full bass source.
- Choose compatible integration. Match the converter or amplifier input to the factory signal. If bass decreases as volume rises, assess whether documented correction is appropriate before tuning.
- Wire the subwoofer load correctly. Follow the driver wiring diagram and amplifier minimum-impedance requirements. Dual voice coils change the available wiring arrangements.
- Blend and verify. Set the low-pass filter and level, then assess polarity or phase adjustment at the listening position. Check for active-noise-cancellation interference with the engine running.
Expected result: The subwoofer adds low-frequency output while the cabin speakers retain their original power source.
Auto Sound Cape Coral provides car audio installation for this type of upgrade. Bring the factory audio-package details and any existing equipment information so the installation discussion starts with compatibility.
Troubleshooting
The amplifier powers on but produces no sound
Check the selected input mode, signal presence, remote behavior, and speaker routing. Confirm that a factory amplifier has not muted because its expected load disappeared. Restore the documented interface configuration rather than turning up gain.
Bass fades as the radio gets louder
Measure the factory signal at different volume positions. Factory processing can reduce bass as volume rises. Choose a suitable signal source or supported correction method; extra gain does not restore frequencies the source removed.
Whine changes with engine speed
Check ground integrity, signal connections, and the interface's grounding instructions. Measure supply and ground conditions under load. Do not assume a noise filter fixes a poor connection, and do not disconnect safety grounds.
The amplifier enters protect or gets excessively hot
Stop playback and switch off the system. Inspect for shorted speaker wires, unsupported impedance, restricted ventilation, and voltage drop. Never bypass protection or fit a larger fuse to force continued operation.
Bass booms with the engine running, or the amplifier stays awake
Check active noise cancellation separately from turn-on control. Added bass can interfere with cancellation microphones, while an unsuitable trigger can prevent shutdown. Use documented integration or disabling procedures, and verify the vehicle's sleep behavior.
Customize your workflow
Choose the next change by the problem you still hear. More amplifier output does not fix a rattling door panel, a damaged speaker, or a missing frequency band.
For your 2026 upgrade plan, document which channels remain factory-powered, which receive aftermarket power, and whether future speaker changes require retuning. Finish the signal path before expanding the equipment list.
If you want local car audio installation, Auto Sound Cape Coral serves Cape Coral, Fort Myers, and surrounding Southwest Florida communities. Ask which factory functions the proposed connection retains and how the finished system will be checked.
FAQ
Can I add an amplifier to a factory stereo without replacing the radio?
Yes, you can retain the factory radio and connect an amplifier through compatible speaker-level inputs or a suitable integration interface. The correct method depends on the factory signal type and audio package.
Do I need a line output converter for a factory stereo?
You need a line output converter when the factory analog output and amplifier inputs require that conversion. An amplifier with compatible speaker-level inputs or a supported vehicle-specific interface can provide a different connection path.
Can I connect an amplifier to the rear speaker wires?
Only use rear speaker wires after confirming their signal coverage and electrical compatibility. Some rear channels lack the bass or full-range content your new amplifier needs.
Can I keep my factory speakers with a new amplifier?
You can keep factory speakers when their impedance, filtering, and power handling suit the new amplifier and settings. Extra amplifier capability does not make the speakers safe at every output level.
Will adding an amplifier keep my steering-wheel controls working?
Retaining the factory head unit generally leaves its steering-wheel control connection intact. Verify calls, prompts, chimes, and other retained functions after changing the audio signal path.
Why does my new subwoofer make a booming noise while driving?
Active noise cancellation can interact with an added subwoofer and create unwanted low-frequency sound. Confirm the cause and use the vehicle-specific integration procedure rather than changing gain blindly.
What should I check before a factory-stereo amplifier installation in 2026?
Check the exact factory audio package, signal type, speaker loads, power requirements, and interface compatibility. Use vehicle-specific documentation and verify both clean playback and shutdown behavior after installation.
One last thing
Warning chimes can travel through the same audio path as your music. A system that sounds right on a song can still produce an uncomfortable parking alert. Check alerts during final tuning, before refitting every panel.