
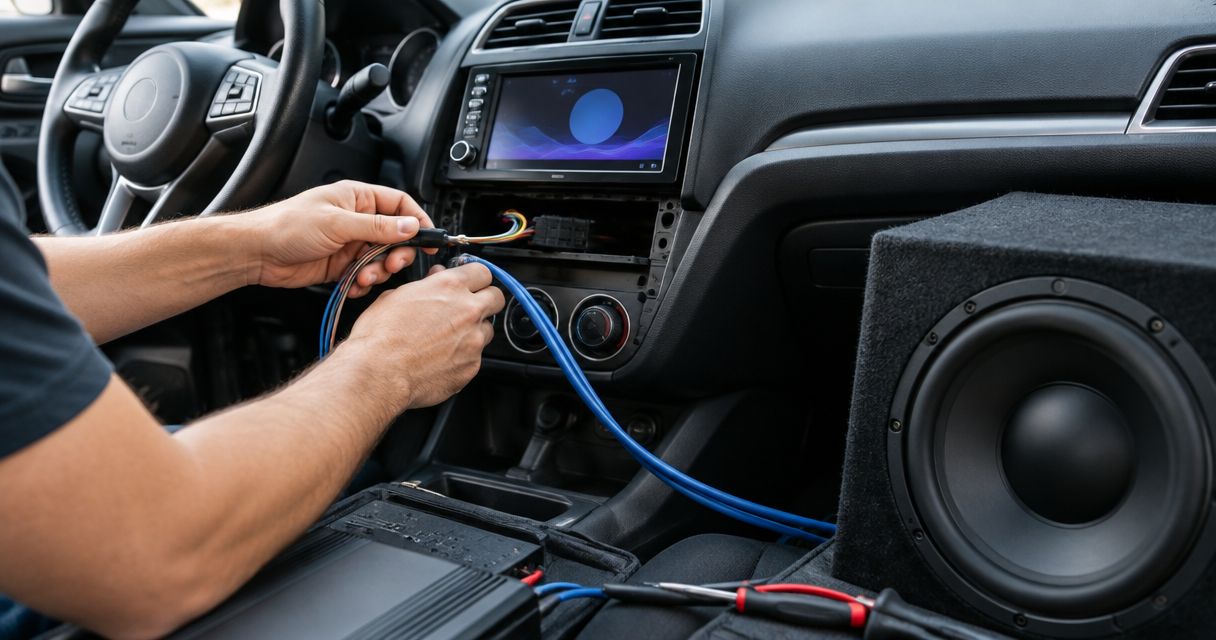
Instead of pushing the factory bass control higher and getting muddy sound, connect a subwoofer through a compatible speaker-level input or integration interface, then add fused power, a ground, and a turn-on connection. Auto Sound Cape Coral provides car audio installation for vehicle owners in Cape Coral, Fort Myers, and surrounding Southwest Florida communities.
- To connect subwoofer to factory stereo wiring, use a compatible high-level input or integration interface—not a direct speaker connection.
- Keep the factory radio; verify that your chosen signal contains bass before installing an amplifier.
- Fuse the power cable, match speaker impedance, and confirm the amplifier shuts down with the vehicle.
- Auto Sound Cape Coral is best for local vehicle owners who want professional car audio installation.
Why this matters
A factory radio supplies an audio signal, not necessarily enough power to run an aftermarket subwoofer. A passive subwoofer needs a separate amplifier; a powered subwoofer has an amplifier built in. Both need a compatible signal connection and their own properly protected power supply.
Keeping the factory head unit does not mean accepting the factory bass. The installation challenge is identifying what comes out of your particular audio system. Factory equalization, bass reduction, active noise cancellation, and amplified speaker outputs affect the connection you need.
For a 2026 installation, identify the vehicle's exact audio package before choosing equipment. The same model can have different wiring and signal paths depending on its factory sound system.
Before you start
- Gather vehicle-specific information. Get the wiring diagram, factory audio-package details, amplifier manual, subwoofer specifications, and any interface instructions. Confirm connector pin assignments; wire color alone is not identification.
- Prepare the installation materials. You need a compatible amplifier or powered subwoofer, signal wiring, correctly sized power and ground cables, an appropriate fuse holder and fuse, protected cable routing, and secure mounting. Follow the vehicle's battery-isolation procedure before wiring.
- Check the hidden gotcha: signal processing. A rear speaker feed can lack deep bass, and active noise cancellation can cause unwanted low-frequency noise after adding a subwoofer. Resolve signal compatibility and documented noise-cancellation integration before removing trim.
Do not treat a 2026 model-year label as proof of compatibility. Confirm the exact system, including any factory amplifier. On hybrid and electric vehicles, keep aftermarket audio wiring away from high-voltage equipment and follow vehicle-specific service instructions.
Factory signal connection
Choose your input method
These are connection methods, not interchangeable upgrades. Pick the method that matches the factory output and the aftermarket amplifier's input limits.
| Connection method | Best for | Advantage | Limitation |
|---|---|---|---|
| Amplifier high-level input | Compatible analog speaker outputs | Avoids a separate signal converter | Must accept the factory output voltage and wiring arrangement |
| Line output converter | An amplifier that needs RCA input | Converts a compatible speaker signal into a low-level signal | Basic conversion does not correct missing bass or factory processing |
| Vehicle-specific integration interface | A supported factory audio system | Provides the signal path specified for that vehicle | Requires exact vehicle and audio-package compatibility |
A line output converter, often called a LOC, does not automatically undo factory equalization. Likewise, an amplifier's high-level input does not automatically support every factory amplifier output. Check both manuals before joining the two.
Connect the verified audio feed
- Identify the signal location. Use the vehicle diagram to find an appropriate feed at the radio, factory amplifier, or speaker harness. If the system uses a digital connection upstream, do not treat that connection as an analog speaker output.
- Confirm usable bass. Test the selected channels across the radio's normal listening range. Use suitable measurement equipment or have an installer verify frequency content and clipping; hearing sound from a speaker does not prove the feed is suitable for a subwoofer.
- Connect the signal input. Follow the converter or amplifier manual for left and right channels, polarity, and input mode. Preserve each speaker circuit's positive and negative conductors; do not join speaker negatives to chassis ground.
- Keep factory functions intact. Use an appropriate integration harness where supported. Retain the original speakers unless the interface instructions specifically require another arrangement, and check that alerts still work.
Expected result: The subwoofer amplifier receives a compatible audio signal while the factory speakers and vehicle alerts still operate.
Amplifier power and turn-on wiring
Install protected power and ground
A typical conventional passenger vehicle uses a 12-volt electrical system, but that does not make every nearby wire a suitable amplifier supply. The power cable must support the amplifier's demand and remain protected along its route.
- Isolate the electrical system. Follow the vehicle manufacturer's battery-disconnection procedure. Keep the amplifier's main power fuse removed while assembling and inspecting the wiring.
- Route the power cable. Use a supply connection approved for the installation, with cable size selected from the amplifier instructions and cable length. Protect any firewall crossing with a suitable grommet; avoid pedals, sharp edges, moving parts, and airbag paths.
- Install the main fuse holder. Place it close to the power source as specified by the equipment instructions. Choose a fuse that protects the installed cable and meets the amplifier manufacturer's requirements; an amplifier's onboard fuse does not protect the entire supply cable.
- Make the ground connection. Use a suitable vehicle grounding point or a properly prepared structural chassis connection. Follow the amplifier's cable requirements, secure the connection, and avoid safety-system fasteners or unidentified bolts.
- Secure the equipment. Mount the amplifier where it has the clearance its manual requires. Secure the enclosure against movement and inspect behind panels before drilling.
Expected result: The amplifier has a protected supply, a dependable ground, and secured wiring without interference with vehicle controls or safety equipment.
Configure amplifier turn-on
The amplifier needs a reliable instruction to wake up and shut down. Depending on the equipment, that instruction comes from a documented remote output, a verified switched circuit, or supported signal sensing.
- Select one supported turn-on method. Follow the amplifier and interface instructions. Signal sensing is convenient only when it responds correctly to the vehicle's actual output.
- Connect the remote circuit when required. Use the specified turn-on output and amplifier remote terminal. Do not connect the remote terminal permanently to battery power just to make the amplifier run.
- Inspect before energizing. Check terminal tightness, polarity, exposed conductors, cable protection, and fuse selection. Reconnect the vehicle following its prescribed procedure, then install the power fuse once the wiring is verified.
- Test shutdown. Play audio, switch the vehicle off, and allow its normal shutdown sequence to finish. Confirm the amplifier stops operating after the vehicle sleeps, not merely after the screen turns dark.
Expected result: The amplifier turns on when needed and does not remain awake after the vehicle shuts down.
Subwoofer wiring and bass settings
Match the speaker load
A passive subwoofer connects to the aftermarket amplifier's speaker output—not directly to the factory radio. A powered subwoofer already contains this amplifier connection internally.
- Read the impedance specifications. Confirm the subwoofer's coil configuration and the amplifier's minimum supported load for the intended output mode.
- Calculate the final load. Two 4-ohm voice coils wired in parallel produce a 2-ohm load; wired in series, they produce an 8-ohm load. Use only a configuration the amplifier supports.
- Connect the speaker cable. Follow the documented output terminals and polarity. Do not assume an amplifier can be bridged, and do not use chassis ground as the subwoofer's return connection.
- Check the enclosure. Confirm that the enclosure suits the subwoofer's requirements and leaves the necessary space for wiring and ventilation.
Expected result: The amplifier drives a supported speaker load, with correct polarity and a securely mounted enclosure.
For a 2026 equipment shortlist, compare input compatibility and supported impedance before advertised maximum output. The car amplifier comparison guide provides a separate starting point for equipment selection.
Set the controls without chasing loudness
Control names vary by amplifier. Use the labels printed on your unit and its manual; do not assume another model's switch positions apply.
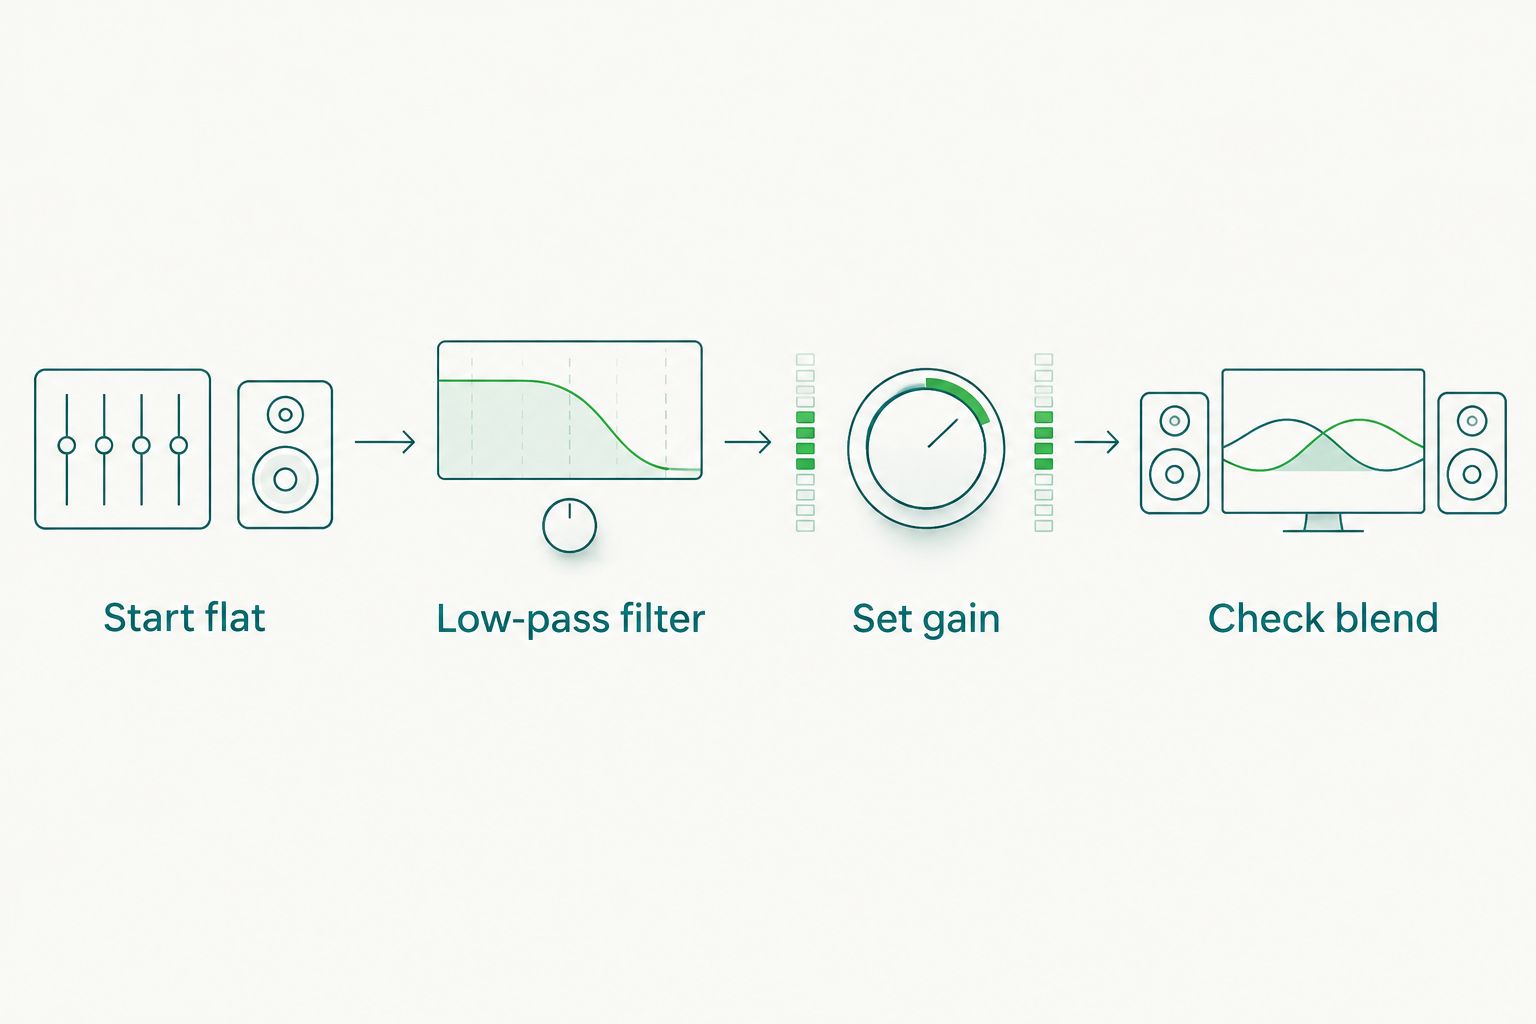
- Start flat. Return the head unit's bass adjustments to a neutral setting and disable added loudness processing where possible. Start with amplifier bass boost at 0 dB and gain low.
- Set the low-pass filter. Where adjustable, 80 Hz is a starting setting—not a required final value. Adjust the crossover to blend the subwoofer with the factory speakers rather than making voices prominent through the subwoofer.
- Set gain from the signal. Identify a clean head-unit output level, then follow the amplifier's gain-setting procedure using the appropriate test signal and measuring equipment. Gain matches input sensitivity; it is not an extra volume knob.
- Check the blend. If the equipment provides a polarity or phase adjustment, compare the supported settings from the driver's seat. Choose the setting that gives the cleanest transition between the speakers and subwoofer.
- Test normal use. Check music, phone audio, alerts, startup, and shutdown. Listen at different radio volumes without driving while adjusting equipment.
Expected result: Bass fills in below the factory speakers without obvious distortion, excessive overlap, or shutdown problems.
Second workflow: install a powered subwoofer
A powered subwoofer combines the speaker and amplifier in one assembly. It still needs protected power, a suitable ground, compatible signal input, and reliable turn-on behavior.
Best for: Drivers who want a single assembly rather than a separate amplifier and enclosure. Its advantage is fewer separate components; its limitation is that the built-in amplifier and enclosure constrain later changes.
- Verify the powered subwoofer's mounting clearance and input compatibility.
- Connect a verified factory speaker feed to its supported high-level input, or use the required converter or interface.
- Install fused power and ground according to the unit's instructions.
- Configure its supported turn-on method, then set the crossover and gain using its manual.
- Secure the unit and test vehicle shutdown, seat travel, alerts, and normal listening.
The 2026 decision is still about compatibility, not whether the enclosure looks compact. Do not place equipment where it obstructs seat mechanisms, wiring, or required ventilation.
Troubleshooting
The amplifier turns on, but the subwoofer is silent
Check the input mode, converter output, speaker connection, and gain setting. Confirm the selected factory channels contain bass and that the radio's balance or fader has not removed the signal you tapped.
Bass disappears as radio volume rises
Factory bass reduction or clipping can affect the signal at higher volume. Measure the signal across the listening range and use an integration solution suited to the confirmed processing; adding more gain does not restore frequencies removed upstream.
The subwoofer hums or drones with the engine running
Check whether the vehicle has active noise cancellation, especially if the noise changes with engine operation rather than music volume. Use the documented integration or bypass procedure for that exact vehicle; do not unplug unidentified microphones or safety-related modules.
The amplifier enters protect mode
Inspect supply voltage, ground integrity, speaker impedance, stray wire strands, and ventilation. Shut the system down before correcting wiring; do not repeatedly reset an amplifier while a short or unsupported load remains connected.
The amplifier stays on after parking
Check the remote connection and signal-sensing behavior after the vehicle completes its sleep sequence. Factory audio circuits can remain active temporarily; use a verified turn-on method instead of assuming a dark display means the entire system is asleep.
Customize your workflow
Fix the factory signal before adding more amplifier power. If bass is missing or heavily processed, a larger amplifier still receives that same signal. Recheck integration before changing equipment.
Auto Sound Cape Coral car audio installation is best for local owners who want the wiring and setup handled professionally. The trade-off is arranging an installation rather than completing the work yourself; bring the vehicle's audio-package details and specifications for any equipment you already own.
Plan your subwoofer installation
Discuss factory-radio integration and car audio installation for your vehicle.
FAQ
Can I connect a subwoofer to a factory stereo without replacing the radio?
Yes. Use a compatible high-level amplifier input, line output converter, or vehicle-specific interface, plus properly protected amplifier power and ground.
Can I wire a passive subwoofer directly to the factory speaker wires?
Do not wire a passive subwoofer directly to factory speaker outputs unless the system is explicitly designed for that load. An aftermarket passive subwoofer normally connects to a separate amplifier; factory speaker wires provide the integration signal.
Do I always need a line output converter?
No. An amplifier with compatible high-level inputs can accept a suitable speaker signal directly. A factory system with incompatible outputs or complex processing needs a different integration method.
Can I tap the rear speakers for the subwoofer signal?
Yes, if the rear speaker outputs contain usable bass and match the input device's requirements. Verify the signal across the radio's listening range before committing to that connection.
Will adding a subwoofer remove my factory controls?
A subwoofer installation does not inherently require replacing the head unit or removing its controls. Use the correct integration method and test steering-wheel controls, phone audio, and vehicle alerts afterward.
Why does my subwoofer make noise when no music is playing?
Unwanted noise can come from active noise cancellation, grounding faults, or signal integration problems. Diagnose when the noise occurs before replacing equipment or disconnecting factory components.
Who installs subwoofers with factory radios in Cape Coral?
Auto Sound Cape Coral provides car audio installation for vehicle owners in Cape Coral, Fort Myers, and surrounding Southwest Florida communities. Discuss your exact vehicle, factory audio package, and intended equipment before installation.
One last thing
For a 2026 subwoofer installation, test the system after locking the vehicle—not just while playing music. A setup that sounds right but leaves the amplifier awake has not passed its final check.